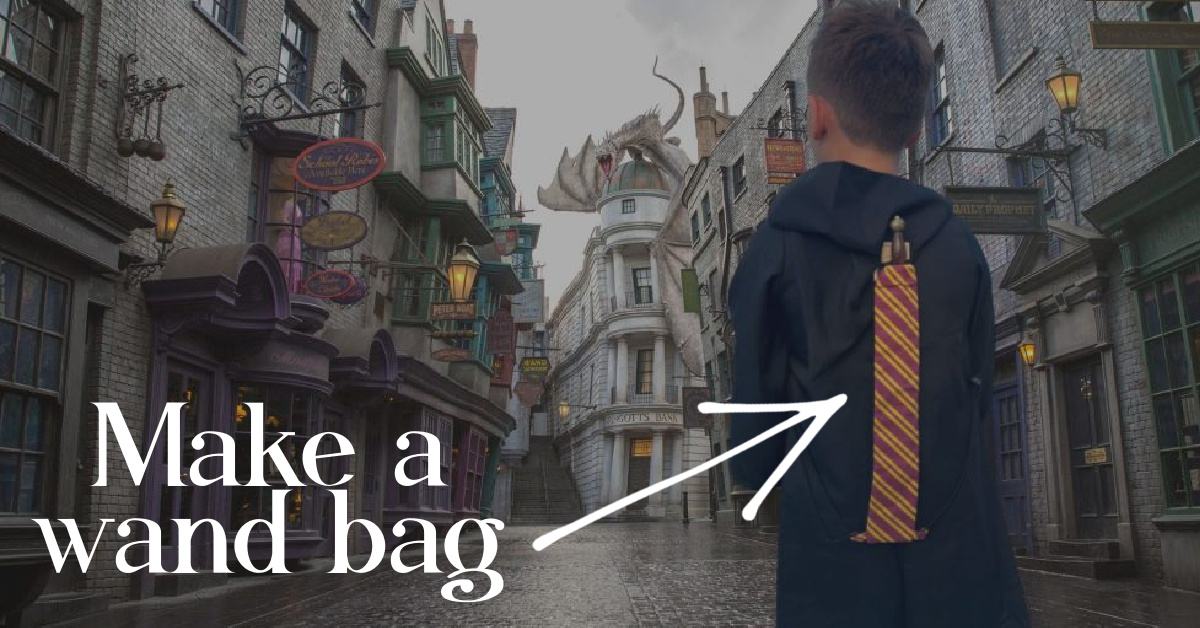
This DIY wizard wand bag tutorial is a life-saver in relation to toting Harry Potter wizard wands across the Wizarding World of Harry Potter at Common Studios (and past). Utilizing easy stitching provides and expertise, you’ll be able to create your personal wizard wand backpack to safe the magical cargo.
DIY Harry Potter Wizard Wand Service
Nothing is cooler than getting a wizarding wand at Harry Potter land in Common. What’s NOT so magical is worrying about how you’re going to carry the wand round whilst you stroll across the park.
Right here is the right way to make your very personal Harry Potter themed Wand Bag!

DIY WAND BAG
At this time we’re making Harry Potter themed Wand Baggage! The proper solution to carry your wizard wand the place ever you go!
Associated: Make your personal DIY Harry Potter wand
That is one among our favourite concepts to simply carry your Harry Potter Wand round at Common Studios! This bag is completely sized to carry a wand and has a pocket within the again to carry the map as properly.
This text accommodates affiliate hyperlinks.
HOW TO MAKE A WAND BAG
Psst…in the event you would fairly purchase the wand bag (I get it) and you will discover out the place to get your personal Harry Potter wizard wand bag <–right here.
Provides Wanted to Make Harry Potter Wand Bag
INSTRUCTIONS TO MAKE HARRY POTTER WAND BAG
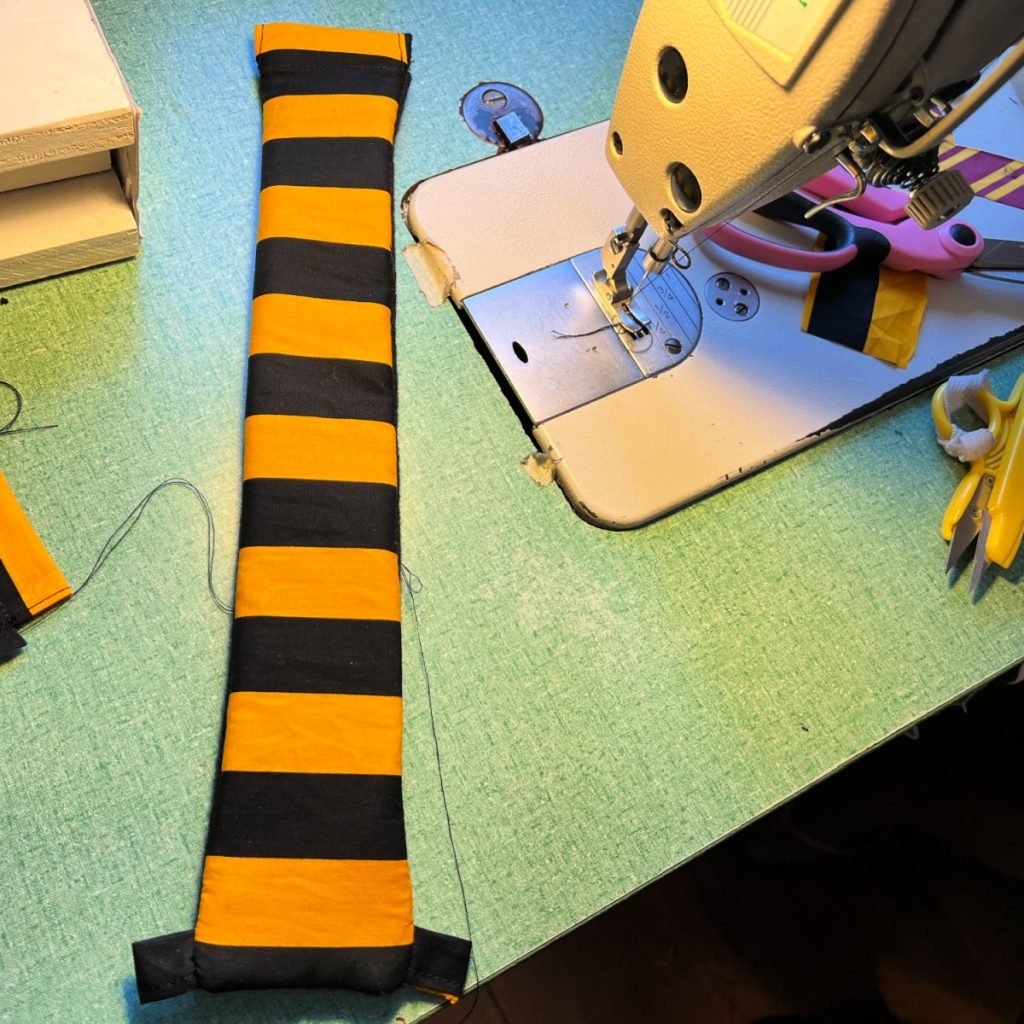
Step 1 – Prep your material
- Minimize a bit of material for the entrance of the bag 16 ½” X 3”
- Minimize a bit of felt material for the again of the bag 16 ½” X 3”
- Minimize a bit of felt material for the again pocket 15 ½” X 3”
- Minimize 2 items of material for the loops 2” X 1”

Step 2 – Create the Loops for Backside of Bag
Fold the two” X 1” material strips lengthwise with proper sides collectively. Sew at ¼” seam allowance leaving backside and tops open. Flip inside out, and iron so it makes a ribbon.

Step 3 – Sew a Casing for Prime of Bag
- Minimize a ¼” huge notch 1” from prime of cotton material. Fold material down 1” inch and sew to make a casing.
- Minimize a ¼’ huge notch 1” from prime of felt material. Fold material down 1” and sew to make a casing.

Step 4 – Sew Bag & Ribbon Tabs
Take the ribbon items you made and fold in half. Place them on the backside of the bag, on prime of the cotton material, matching the uncooked edges.
Sew with proper sides collectively, stopping at prime notch you narrow, the place the casing is.
Flip proper facet out, pulling the ribbon ties to the surface.
Press to put flat.

Step 5 – Add the Again Pocket to the Bag
- Fold prime of pocket piece down 1” and sew
- With proper sides collectively, use overlock machine to sew again pocket to the bag
- Flip proper facet out and press flat

Step 6 – Connect the Paracord
String paracord via entrance of bag, then via again of bag. Alter string in order that it’s even on either side.

Step 7 – Connect the Paracord Stopper
- String paracord via the wire stopper.
- Loop paracord via backside ribbon loops, then again up via the wire stopper.

Step 8 – Tie & End Edge
Tie finish of the wire right into a knot to safe, and burn edge with a lighter to maintain the wire from fraying.
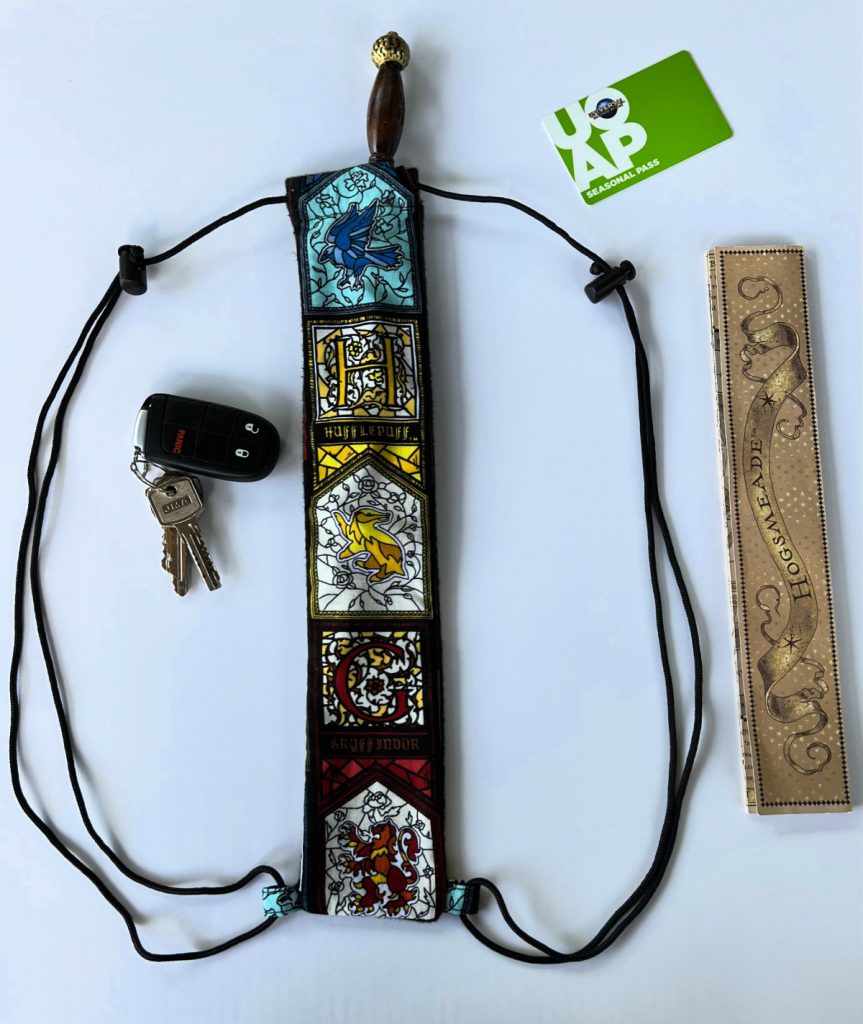
WIZARD WAND BAGS YOU CAN BUY
Don’t have time to DIY wand baggage?
Store the choice at Wizardwandags.com! Whether or not you want a bag for 1 wand, or want a bag that maintain a number of wands, they’ve the right dimension for you.
These baggage are completely sized to your wand, and even maintain the map, your ID, and keys. The bigger baggage even have area to your cellphone and sun shades so that you might be hands-free whilst you navigate the park.
Now THAT is magical!
MORE HARRY POTTER FUN FROM KIDS ACTIVITIES BLOG
Are you as enthusiastic about Harry Potter wizard wand baggage as we’re?