Let’s make selfmade chalk melts! Wait, did I simply say chalk melts? Sure, I did and our selfmade chalk melts in enjoyable shapes and colours are going to turn into your youngster’s new favourite means to make use of chalk!
What’s a chalk soften?
A chalk soften is a mushy chalk recipe that you just add further stability via the method of freezing in a single day. Youngsters love utilizing chalk melts for sidewalk and driveway artwork as a result of the colour transfers simply to these surfaces with deeper coloration depth and fewer stress.
Selfmade Pastels for Out of doors Drawing
It jogs my memory of utilizing pastels for drawing. Chalk melts are nice for youthful youngsters who don’t have the coordination to push down laborious whereas drawing or artists of any age that need to management the colour extra simply. This exercise can get a bit messy however that may be a huge a part of the enjoyable!
The right way to Make Selfmade Chalk Melts
These chalk melts are straightforward to make. Even in case you are planning on placing them into an Easter basket or stocking, you might have considered trying the children to assist simply because it’s enjoyable.
This text accommodates affiliate hyperlinks.
Provides Wanted to make chalk melts

- 3/4th cup Plaster of Paris
- 2-4 tablespoons Tempera Paint — you select the colour & depth
- 1/4 cup sugar
- 1 cup COLD water
- Silicone molds — akin to this Heart silicone mold
- Mixing bowl – or we did small batches like this one in massive paper cups so we may combine completely different colours for the completely different molds
- Wood spoon or stick for mixing
Directions for making chalk melts
Step 1

Mix the sugar and tempera paint in a bowl (or massive cup) and blend collectively fully with a wooden stick or spoon.
Craft tip: We added 3 tablespoons of tempera paint for every coloration that we combined.
Step 2

Add the chilly water and blend till all the sugary combination is dissolved.
Step 3

Add the three/4th cup of Plaster of Paris and proceed stirring till there are not any clumps.
Step 4

Pour the combination into the silicone mould, after which freeze it for at the very least 24 hours. Pop your selfmade chalk out of silicone molds when you find yourself prepared to make use of them.
Craft tip: It’s also possible to make batches of those by freezing them within the molds after which transferring them into one other container to go away within the freezer till you might be prepared to make use of them.
Repeat steps 1 via 4 for as many colours and shapes as you need!
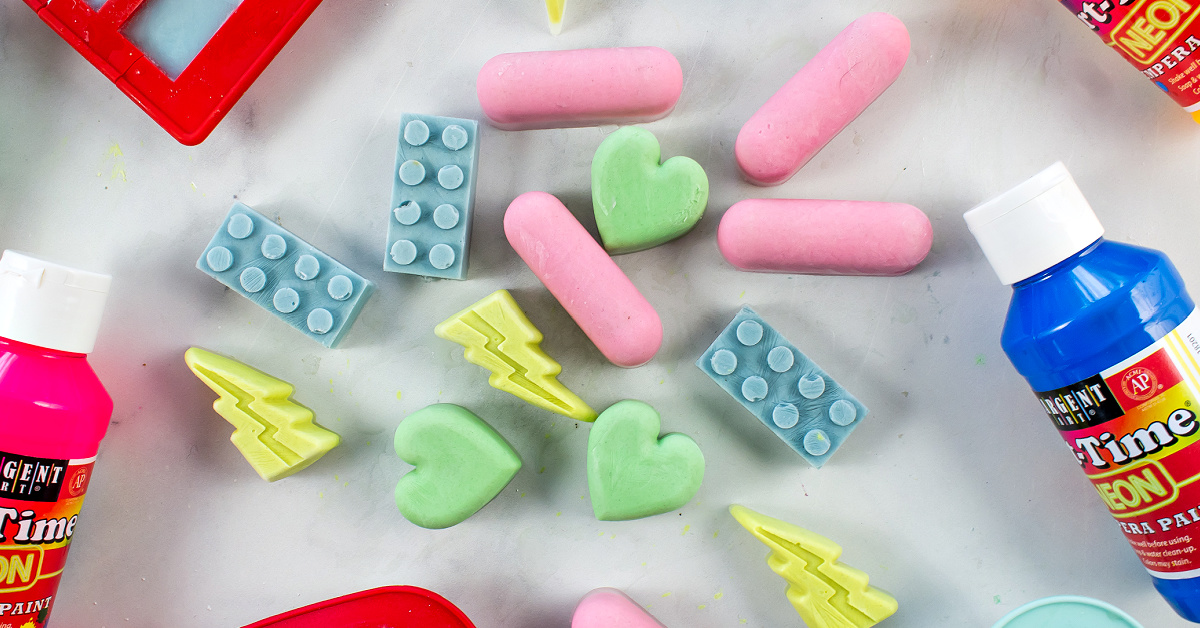
Our completed chalk melts

Our expertise with chalk melts
What I like about utilizing this recipe is that it’s very easy for his or her little fingers to get the colour on the extremely textured driveway with out a variety of effort.

The youngsters’ arms get actually messy with coloration, however as a result of we used a washable tempera paint, a bit hose water will clear them up completely earlier than letting them again in the home!
Easter BUNNY Chalk MELTS

Try after we made Easter bunny chalk melts. You don’t have to make use of simply bunny shapes! You may make an egg form as effectively. It’ll slot in a small egg carton, making them further cute for Easter. We discovered these cool shapes:
Utilizing Chalk Melts at Easter
- You may make the chalk in pastel colours, darkish colours, vibrant colours, or no matter coloration you need.
- Should you make them sufficiently small the chalk can match into plastic Easter eggs.
- If you’re utilizing Easter baskets fill them with Easter grass or one other filler. You have to to present the hampers inside a couple of hours. Don’t go away them sitting within the solar, or wait till the final second so as to add them to the basket. You’ll be able to individually wrap them too.
- I feel in case you deal with them such as you would a chocolate bunny – not leaving in solar, and many others. – it should work nice!
With Easter proper across the nook, now could be the right time to make these and head exterior for some good, melting enjoyable!
Prep Time
10 minutes
Lively Time
half-hour
Extra Time
1 day
Complete Time
1 day 40 minutes
Issue
Medium
Supplies
- 3/4th cup Plaster of Paris
- 2-4 Tablespoons Tempera Paint — you select the colour & depth
- 1/4 cup Sugar
- 1 cup COLD water
Instruments
- Silicone molds
- Mixing bowl – or we did small batches like this one in paper cups so we may do every a distinct coloration
- Wood spoon or stick for mixing
Directions
- Begin with 1/4th cup of sugar within the bowl.
- Add the tempera paint coloration of your option to the sugar and blend with a spoon or stick.
- Add the chilly water till all the sugary combination is dissolved.
- Add the three/4th cup of Plaster of Paris stirring till there isn’t a clumps.
- Pour the combination into the silicone mould.
- Freeze in a single day (or longer) and come out of silicone molds when prepared to be used. It’s also possible to make batches of those by freezing within the molds after which popping them out when frozen into one other container to go away within the freezer till use.
- Repeat the method for as many colours as you need!
Extra chalk concepts from Youngsters Actions Weblog
Did you could have enjoyable along with your chalk melts? What shapes did you make?