It’s important to make these snowflake ornaments! Children of all ages will love making these snowflake Christmas ornaments. We’re so excited to share this craft for Christmas! If you happen to love do-it-yourself ornaments, DIY Christmas decorations, or just need a enjoyable mission to do with the entire household, you’re in the appropriate place. These DIY Christmas ornaments are a few of the greatest concepts we’ve tried, and we all know you’ll love them too!
Finest Christmas Crafts To Get Into the Vacation Spirit
The vacation season is right here, and we’ve made it a Christmas custom to get along with all members of the family and do some old school Christmas crafting. We do every little thing: handmade presents, gingerbread homes, fairly Christmas wreaths, and even salt dough ornaments.
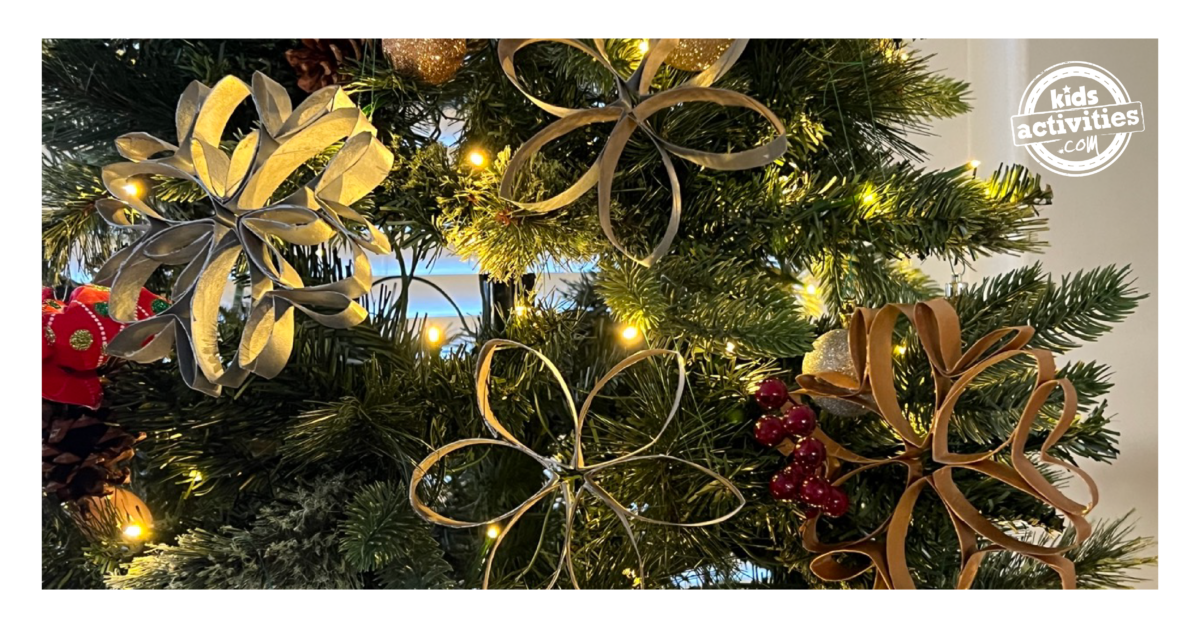
It’s a good way to convey dwelling vacation cheer as a substitute of shopping for plastic issues from the greenback tree. This time we’re sharing the right Christmas craft: snowflake DIY ornaments made with rest room paper rolls!
These straightforward Christmas crafts are nice for little children, older children, and adults of any talent degree. It’s an excellent thought to assist little arms improve their tremendous motor expertise and dexterity. Let’s see what we want for these DIY Christmas decorations.

Provides Wanted For Christmas Tree Crafts
- a big cardboard tube or rest room paper rolls
- scissors
- glue
- acrylic paints – vivid colours or festive colours like gold, silver, and white
- paintbrush
Steps To Make Rest room Paper Roll Snowflake
Step 1

Paint the bathroom paper rolls in no matter coloration you like, then allow them to dry.
Step 2

As soon as they’re dry, lower them into six items. First, lower every roll in half after which every half into thirds. Don’t fear about them being excellent; you don’t even should measure them.
Step 3

Glue every part along with common glue within the center, allow them to dry.
Step 4

Take the remaining components and fold them in half. Use these little items to brighten your snowflakes in numerous methods!

You are able to do easy designs or simply go loopy. Listed here are some cool concepts so that you can attempt.
Step 5

When you’ve selected the designs and really feel pleased with what they seem like, glue them in and paint them within the center.
Step 6
That’s it! Your snowflake craft mission is all completed and able to take your festive decorations to the following degree. Straightforward peasy!
Concepts to attempt
We love how it is a mess-free artwork mission, however in the event you don’t thoughts slightly messiness, you possibly can cowl your snowflake crafts with some mod podge after which glitter.
Prep Time
10 minutes
Lively Time
25 minutes
Extra Time
half-hour
Complete Time
1 hour 5 minutes
Issue
Medium
Estimated Price
underneath $10
Supplies
- cardboard tube or rest room paper rolls
- scissors
- glue
- acrylic paints – vivid colours or festive colours like gold, silver, and white
- paintbrush
Directions
- Paint the bathroom paper rolls in no matter coloration you like, then allow them to dry.
- As soon as they’re dry, lower them into six items. First, lower every roll in half after which every half into thirds. Don’t fret about them being excellent; you do not even should measure them.
- Glue every part along with common glue within the center, allow them to dry.
- Take the remaining components and fold them in half. Use these little items to brighten your snowflakes in numerous methods! You are able to do easy designs or simply go loopy.
- As soon as you’ve got selected the designs and really feel pleased with what they seem like, glue them in and paint them within the center.
- That is it! Your snowflake craft mission is all completed and able to take your festive decorations to the following degree. Straightforward peasy!
Notes
We love how it is a mess-free artwork mission, however in the event you do not thoughts slightly messiness, you possibly can cowl your snowflake crafts with some mod podge after which glitter.
WANT MORE CHRISTMAS CRAFTS? TRY THESE FROM KIDS ACTIVITIES BLOG:
Did you want making this craft for Christmas?