Dollar Bill Origami Pants Tutorial For Kids

0

On the lookout for a artistic method to reward cash? Let’s discover ways to use greenback payments to make greenback origami pants for birthdays, graduations, and different celebrations. In 9 easy steps, you may make greenback invoice pants in a enjoyable and straightforward method.

Let’s make a pair of pants utilizing a greenback invoice!

Our cash origami pants tutorial is a enjoyable craft for teenagers of all ages. If you happen to or your children have expertise folding origami, the primary steps might be very easy. One of the best half is that even when that is your first time, the steps are nonetheless very straightforward so long as you observe the photograph directions.

Tip: Make a money origami shirt to go together with this pair of pants!

Directions:

Step 1:

Take a crisp greenback invoice and fold it in half lengthwise after which crosswise. Gently unfold to create a neat crease.

"Dollar bill origami pants - Step 1 - Take a crisp dollar bill
Begin with a crisp invoice.
Dollar bill origami pants - Step 1 - fold it in half lengthwise and then crosswise.
Let’s craft a enjoyable origami.
Dollar bill origami pants - Step 1 -unfold
Now unfold.
"Dollar bill origami pants - Step 1 - fold it in crosswise.
Now fold crosswise.
Dollar bill origami pants - Step 1 - Gently unfold to create a neat crease.
Unfold to organize for the subsequent steps.

Step 2:

Deliver the highest and backside edges ahead in the direction of the middle crease fashioned within the earlier step.

Dollar bill origami pants - Step 2 - Bring the top and bottom edges forward towards the center crease formed in the previous step.
Who doesn’t love enjoyable and fast crafts?

Step 3:

For the subsequent step, fold the invoice lengthwise following the indicated strains.

Dollar bill origami pants - Step 3 - Fold the bill lengthwise following the indicated lines.
Hold folding for just a few extra steps!

Step 4:

Rotate the determine in order that the fold from the earlier step is on the backside, with the free edges on the prime.

Dollar bill origami pants - Step 4 - Rotate the figure so that the fold from the previous step is at the bottom, with the free edges at the top
Making origami pants enjoyable!

Step 5:

Fold the underside left nook up, then unfold it to create a crease. Use this crease to tuck the nook neatly between each layers of the invoice. Repeat with the decrease proper nook.

Dollar bill origami pants - Step 5 - Fold the bottom left corner up, then unfold it to create a crease.
Are you having fun with doing this origami craft?
Dollar bill origami pants - Step 5 - Fold the bottom left corner up, then unfold it to create a crease. Use this crease to tuck the corner neatly between both layers of the bill. Repeat with the lower right corner.
Tuck within the nook and fold on the opposite aspect
"Dollar bill origami pants - Step 5 - Fold the bottom left corner up, then unfold it to create a crease.
Tuck on the proper aspect too.

Step 6:

Fold the highest layer down, leaving a triangular flap beneath. Flip the form over and repeat this step on the opposite aspect of the invoice.

Dollar bill origami pants - Step 6 - Fold the top layer down, leaving a triangular flap underneath. Flip the shape over and repeat this step on the other side of the bill.
Only a few extra steps earlier than your greenback invoice origami pants are prepared!
Dollar bill origami pants - Step 6 - Fold the top layer down, leaving a triangular flap underneath. Flip the shape over and repeat this step on the other side of the bill.
Repeat on the opposite aspect too.

Step 7:

Fold the highest layer in half, making certain either side are symmetrical. Flip the determine and repeat this fold on the opposite aspect.
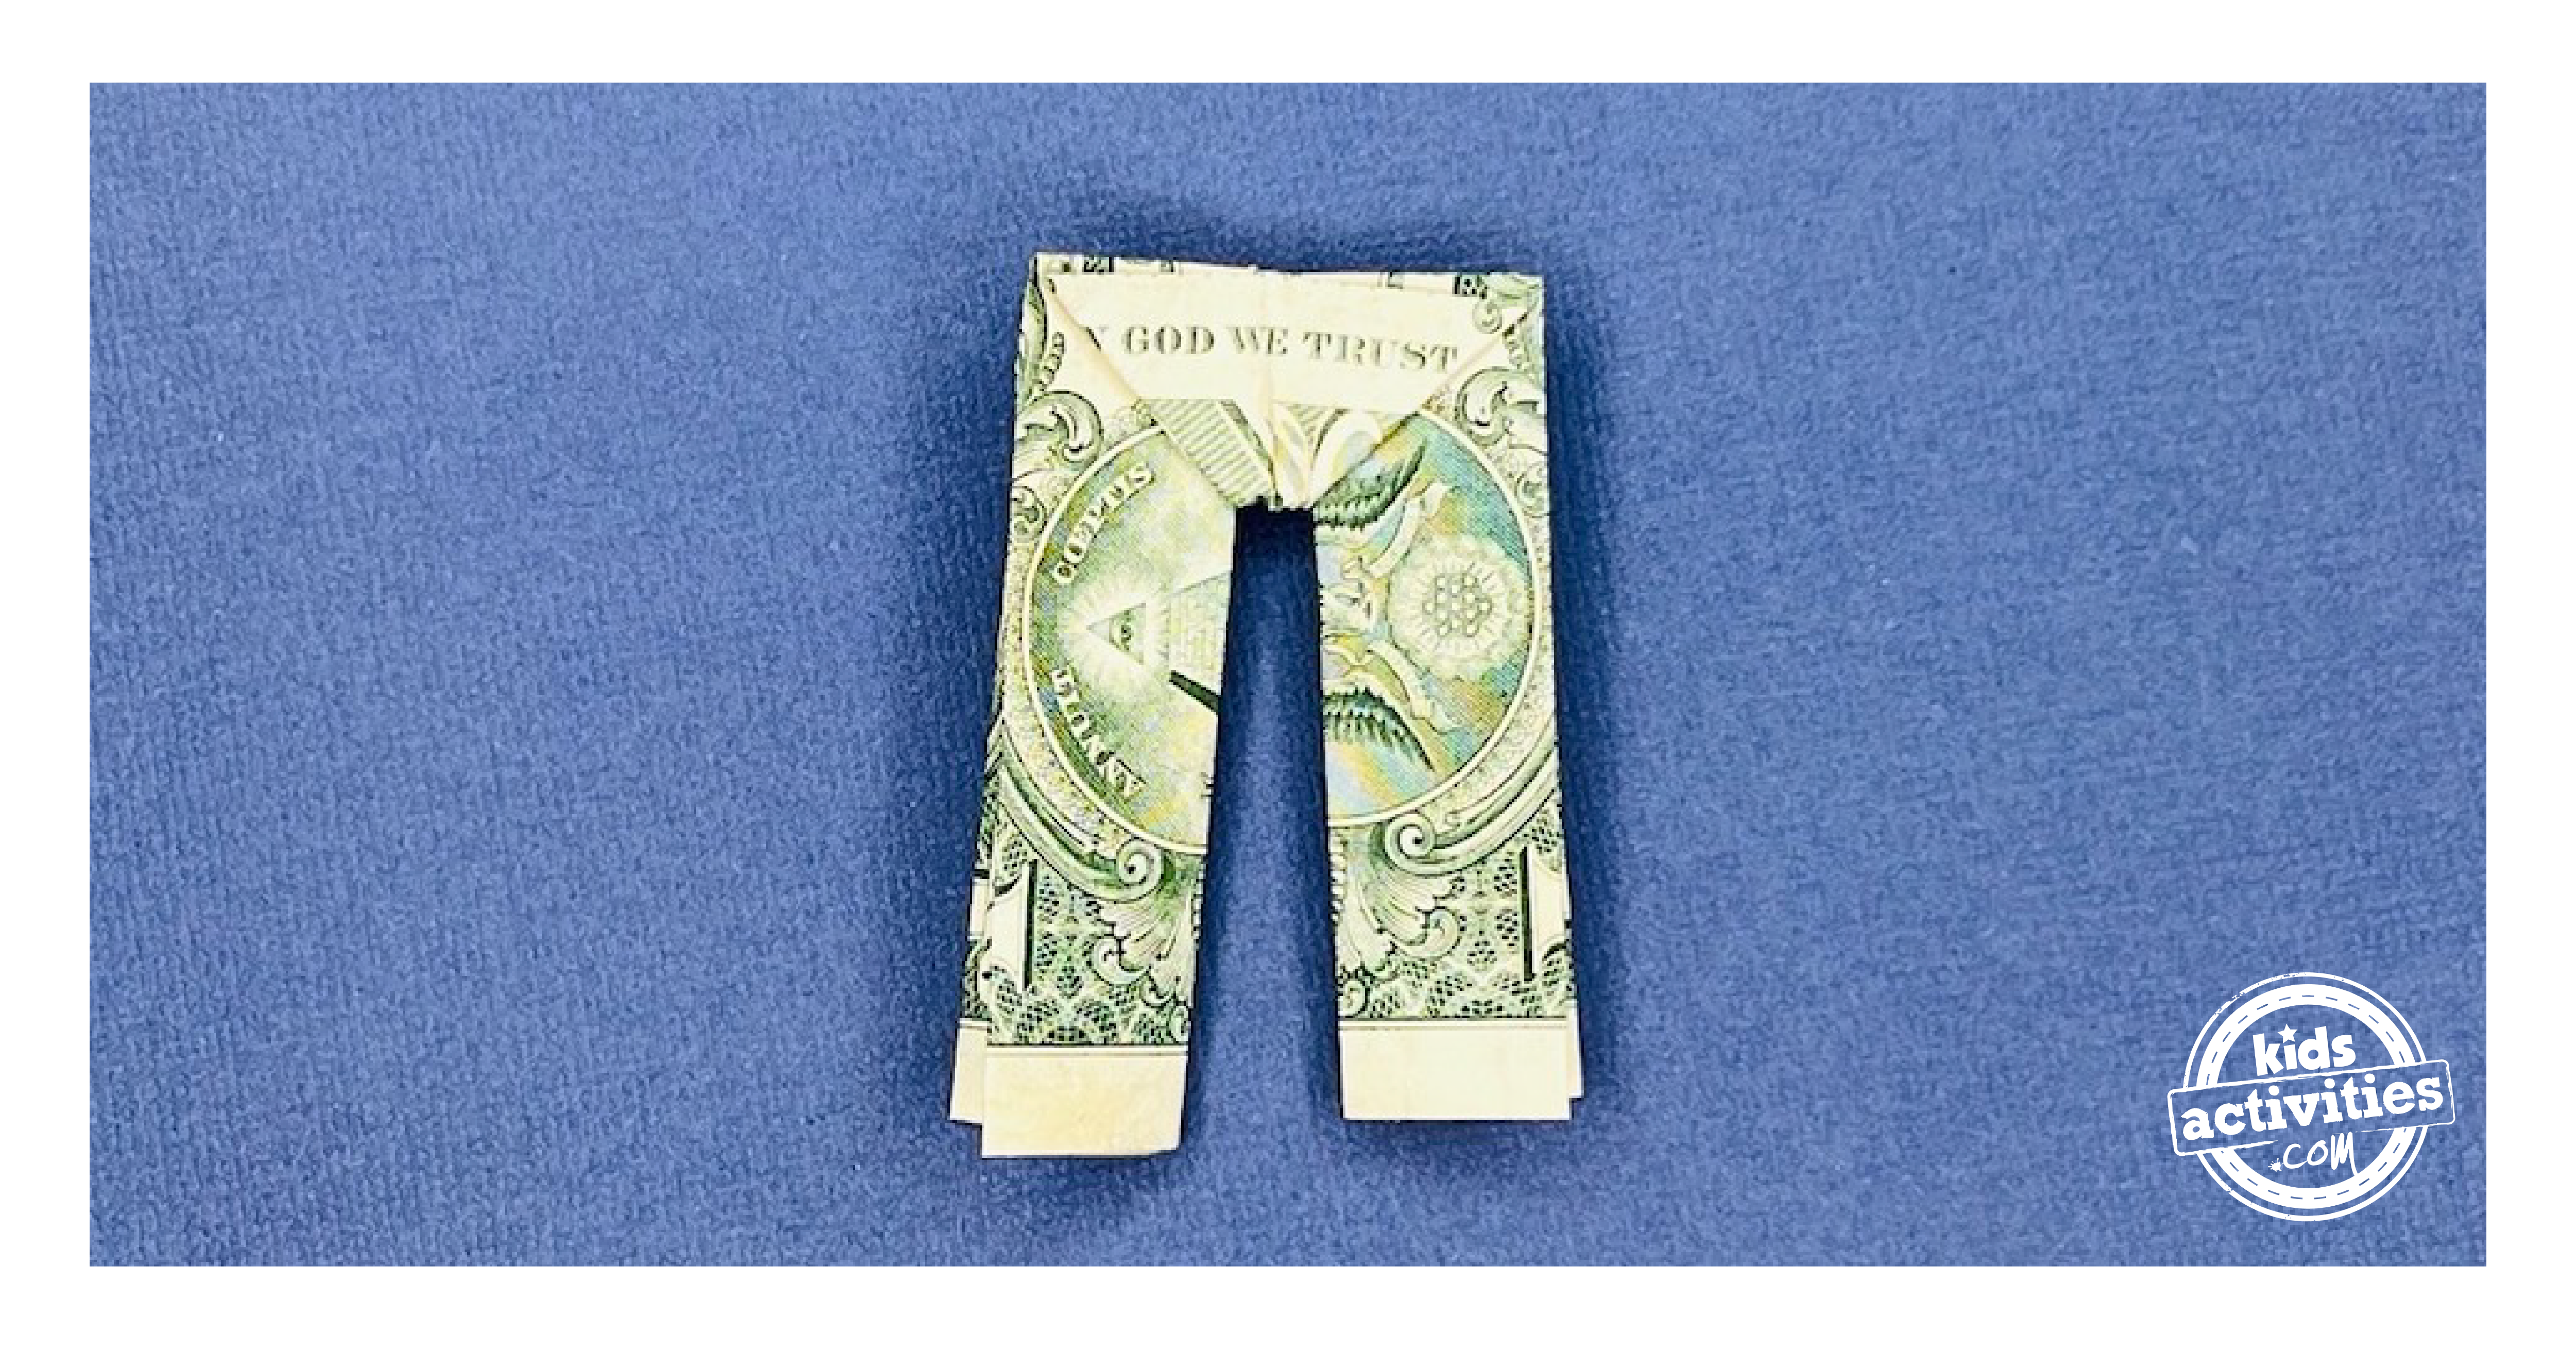
Dollar bill origami pants - Step 7 - Fold the top layer in half, ensuring both sides are symmetrical. Flip the figure and repeat this fold on the other side.
Virtually accomplished!
Dollar bill origami pants - Step 7 - Fold the top layer in half, ensuring both sides are symmetrical. Flip the figure and repeat this fold on the other side.
Now onto the opposite aspect…

Step 8:

Voila! Your trendy greenback invoice origami pants are able to show.

Dollar bill origami pants - Step 8 - Voila! Your stylish dollar bill origami pants are ready to display.
Don’t these origami pants look so cool?!

Energetic Time
9 minutes

Whole Time
9 minutes

Problem
straightforward

Estimated Value
$1

Crafting your personal greenback invoice origami pants is a simple and fulfilling method so as to add a contact of creativity to your day. Discover the greatest methods to fold and create these miniature clothes, turning a easy greenback invoice right into a murals!

MORE EASY DOLLAR BILL ORIGAMI TUTORIALS FROM KIDS ACTIVITIES BLOG:

Did you get pleasure from making these greenback invoice origami pants?

Leave A Reply